

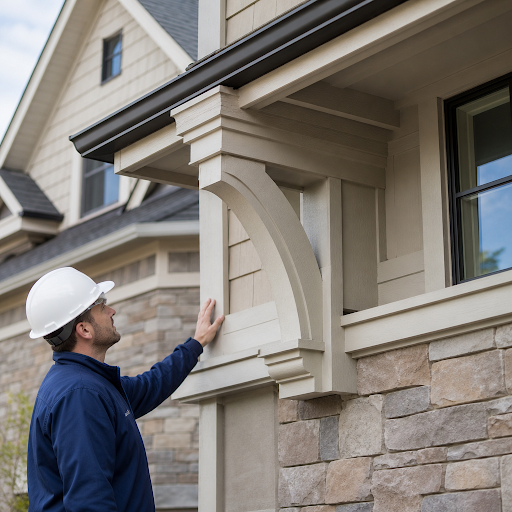
Drive through almost any older neighborhood and you can read the houses by their edges. A gable with a pair of deep timber brackets under the overhang looks settled and intentional. The same gable with nothing under it looks like a builder ran out of budget. Decorative timber accents — corbels, brackets, braces, exposed beam tails — are one of the few exterior upgrades that change a home’s character without touching the floor plan, the roofline, or the siding. They are also one of the easiest things to get wrong, because wood on the outside of a building lives a hard life.
This is a practical look at where these pieces belong, which species hold up in weather, how they get installed, and the maintenance routine that decides whether they last five years or thirty.
The jobs timber accents do
Most exterior timber accents are solving a visual problem, not a structural one. A few common ones:
- Gable brackets fill the awkward triangle where a roof overhang meets a wall and give a flat facade some depth and shadow.
- Corbels carry the eye under a bay window, a cantilevered second story, or a shelf-like window hood, making the overhang look supported rather than stuck on.
- Knee braces work at porch posts and under eaves, reading as a diagonal that stiffens the composition — and in some cases genuinely does stiffen the assembly.
- Headers and timber trim over garage doors and entries anchor the biggest blank rectangles on most houses.
- Shutters and mantels extend the same material language to windows and, indoors, to the fireplace wall.
Scale matters more than style. A 4×6 bracket under a 24-inch overhang looks underfed; a 6×8 or 8×8 under the same overhang looks like it belongs. As a rough rule, the bracket’s vertical leg should land somewhere near two-thirds the height of the space it occupies, and the timber section should be chunky enough to cast a real shadow at midday. Thin stock reads as trim. Heavy stock reads as architecture.
If a piece is actually going to carry load — a porch beam, a true supporting corbel, anything that changes how force travels to the ground — that is an engineering question, not a styling question, and it needs an onsite engineer’s eyes before anyone starts drilling.
Species: the real trade-offs
Exterior wood selection comes down to how much movement, decay resistance, and finish maintenance you are willing to accept.
Douglas Fir
Strong, stiff, and the classic timber-frame look — tight grain, warm color, takes a stain beautifully. It is not the most rot-resistant species on its own, so it rewards generous overhangs, a good finish, and details that shed water. Best where the piece is protected by roof above it.
Western Red Cedar
Light, dimensionally stable, and naturally decay-resistant, which makes it a workhorse for brackets and shutters in exposed positions. It is softer, so it dents, and it will silver out if you leave it unfinished. Many people like that gray. If you do not, plan on refinishing.
Bald Cypress
A Southeastern staple with good moisture tolerance and a quieter grain than fir. It handles humidity and wetting cycles gracefully, which is why it shows up so often on porches in the humid South.
White Oak
Dense, heavy, and closed-cell, so water does not wick through it the way it does through red oak. Expect more weight at install and more attention to fastener choice, since oak’s tannins react with ordinary steel and leave black streaks.
Teak
The premium answer for coastal and salt-spray exposure, with natural oils that shrug off moisture. Usually reserved for specific features — a custom entry element, marine-adjacent work — rather than every bracket on a house.
Worth noting that species choice is not just a durability calculation. It is also an aesthetic commitment, the same way choosing a drivetrain is partly about identity rather than pure math — which is roughly the argument at the center of the debate over why more Americans still hesitate to switch to electric cars. People buy the thing that matches the story they tell about their home.
Installation details that decide longevity
Nearly every premature failure traces back to water that had nowhere to go. A few details that pay off:
- Back off the wall. Mount brackets with a small gap or a drainage plane behind them so trapped moisture can dry. Timber pressed flat against siding is a sponge with a lid.
- Kill the end grain. End grain absorbs water many times faster than face grain. Seal every cut end — including the ones you make on site — before the piece goes up.
- Angle the top faces. A few degrees of slope on any horizontal surface keeps water moving instead of pooling in a seasonal puddle.
- Use the right fasteners. Stainless or properly coated hardware, sized for the species and the load, concealed where the design allows. Lag into framing, not into sheathing.
- Keep it off the ground. Soil contact, mulch piled against a post base, or sprinkler overspray will outpace any finish you apply.
If you want to see how exposed timber behaves when it is designed around weather from the start, the detailing in this timber frame home tour in Squamish, British Columbia is instructive — deep overhangs, heavy sections, and joinery that sheds rather than collects.
Where sourcing matters
Stock brackets from a big-box aisle come in a handful of sizes, which means the piece gets picked to fit the box rather than the building. Made-to-order work solves that, and it is also where you get species matched to the exposure instead of to whatever the supplier had. Tar River Timber Works, based in Oxford, North Carolina, handcrafts decorative and structural timber accents in the USA — braces, brackets, corbels, posts, solid and box beams, headers, shutters, mantels — plus outdoor living structures like pergolas and pavilions and custom teak work, and the company’s own guidance on the causes of wood rot in timber accents is a useful primer on why detailing beats finish coats when it comes to lifespan. For load-bearing pieces, their position is the correct one: have an onsite engineer sign off.
A maintenance rhythm you can actually keep
Exterior timber does not need constant attention, but it does need predictable attention.
- Twice a year, walk the house. Spring and fall. Look at bracket tops, corbel undersides, and anywhere two pieces meet. Dark staining, soft spots, lifting finish, or a fine powdery residue all deserve a closer look.
- Probe suspicious areas. A small awl or screwdriver that sinks into wood with light pressure means decay has started. Catching it at a quarter inch is a repair; catching it at two inches is a replacement.
- Clear the drainage paths. Leaves in a bracket’s inside corner, debris behind a shutter, a clogged gutter dumping water on one bracket all winter — these are the actual culprits.
- Refinish on schedule, not on appearance. Penetrating oils typically want attention every year or two on south and west exposures, longer on protected elevations. Film finishes last longer but fail less gracefully, peeling in sheets and letting water underneath.
- Wash gently. Soft brush and mild detergent. A pressure washer at close range tears open the soft spring grain and gives moisture an open door.
Getting the proportions right the first time
Before ordering anything, cut mock-ups from cheap plywood at full size and tack them in place. Look at them from the street, from the driveway, and at the end of the day when the light rakes across the facade. Shadow is the whole point of these pieces, and shadow only shows up at full scale. A bracket that looked oversized on a drawing often looks exactly right on the wall — and the reverse is just as common. Thirty dollars of plywood and an afternoon of standing in the yard is the cheapest design review available.








Discussion about this post